The Permeability of the Threshold: A Study in Perimeter Insulation Failures
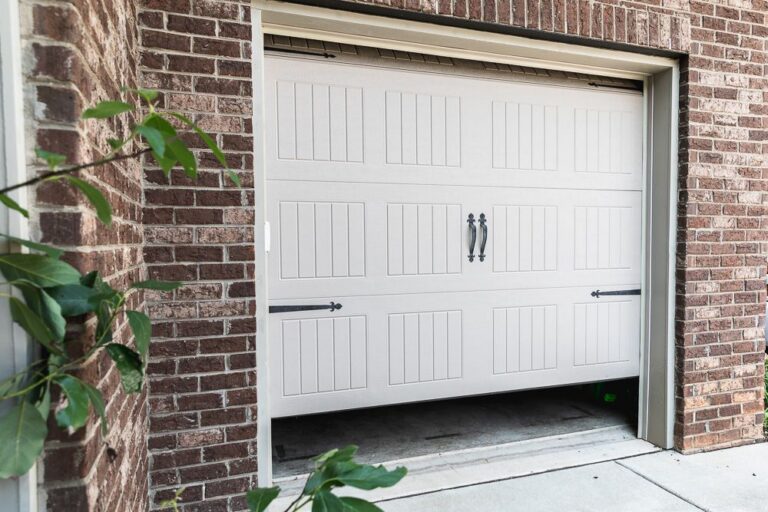
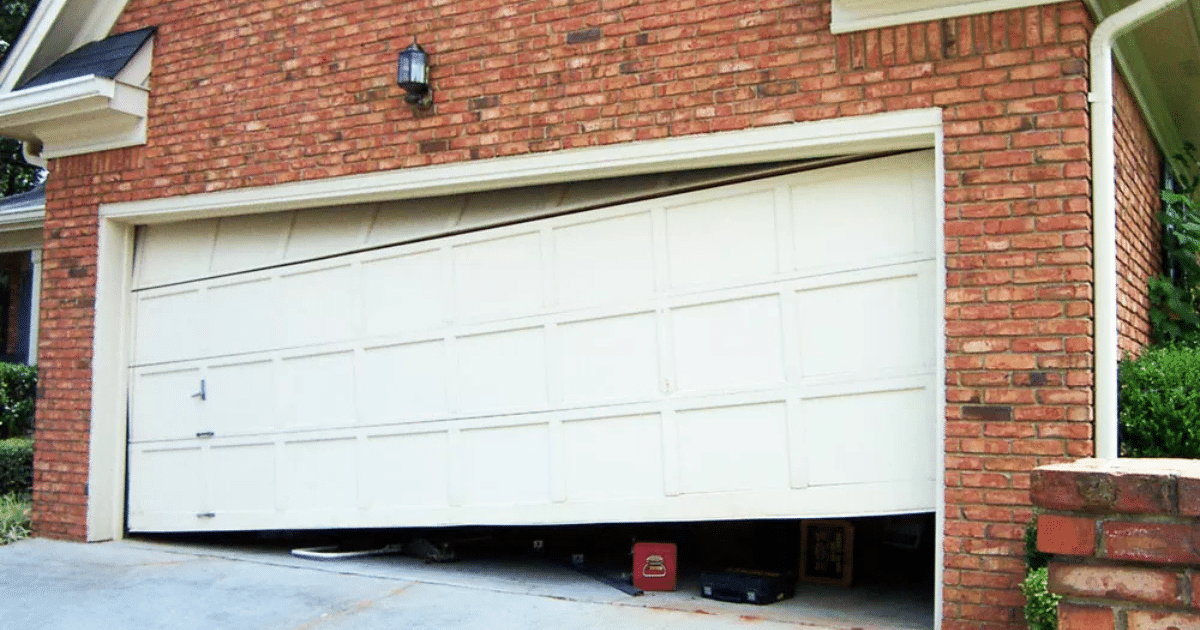
Common garage door weatherstripping mistakes the garage door is the most significant puncture in a building’s thermal envelope. While substantial resources are often directed toward high-R-value wall insulation and triple-pane windows, the interface where the massive overhead door meets the driveway and jambs is frequently treated as an afterthought. This neglect is a tactical error in building science. A garage that is not properly sealed becomes a massive heat sink in the winter and a humidity trap in the summer, directly impacting the operational efficiency of the entire structure, especially if the garage is attached to the primary living space.
Weatherstripping is the primary defense against this thermal migration, yet its installation is deceptively complex. It is not merely a matter of nailing rubber strips to wood; it is an exercise in managing compression, friction, and material compatibility. When executed correctly, weatherstripping creates a pressurized seal that excludes pests, moisture, and unconditioned air. When executed poorly, it creates mechanical drag that burns out opener motors, traps moisture against wooden structural members, and fails prematurely due to UV degradation or improper fastener selection.
Understanding the nuances of this perimeter seal requires moving past the “gap-filler” mindset. We must view the weatherstripping as a dynamic gasket that must maintain its seal across thousands of operational cycles and varying climatic extremes. This investigation seeks to deconstruct the systemic errors that lead to seal failure, providing a rigorous framework for maintaining structural integrity and thermal resistance at the most vulnerable point of the modern home.
common garage door weatherstripping mistakes
Analyzing common garage door weatherstripping mistakes requires a shift from viewing the door as a static wall to viewing it as a kinetic machine. The most prevalent error is the “Over-Compression Trap.” Homeowners and even some general contractors often believe that the tighter the seal, the better the performance. They install the jamb seals so tightly against the door panels that the opener must exert excessive force to move the door. This leads to “binding,” where the door stutters during travel, potentially triggering the safety reversal system or stripping the internal gears of the motor. A proper seal should barely touch the door surface when closed, relying on the material’s natural memory rather than brute force.
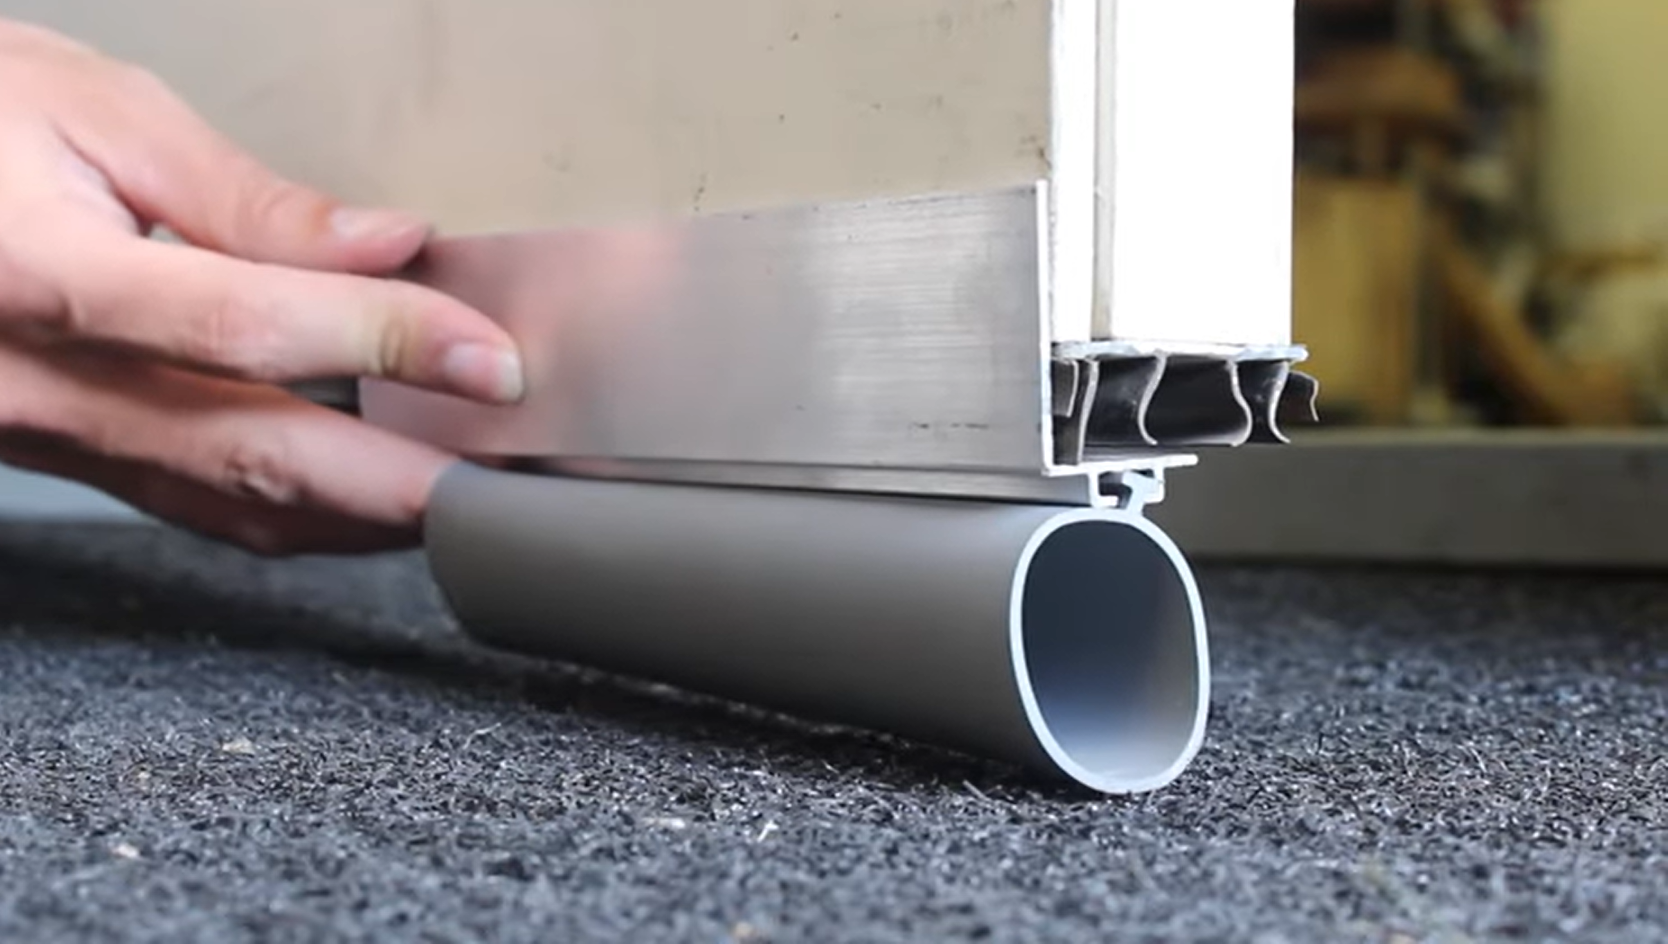
Another frequent oversight involves the “Material-Climate Mismatch.” Using standard EPDM rubber in an environment with extreme UV exposure or sub-zero temperatures often leads to “cracking” or “stiffness.” In colder climates, a stiff bottom seal loses its ability to conform to the minor irregularities of the concrete driveway, leaving “light-gap” vulnerabilities that invite rodents and drafts. Conversely, in high-heat environments, low-quality vinyl can become “tacky,” sticking to the door paint and tearing the seal from its mounting bracket during the first morning cycle.
Furthermore, the “Threshold-Level Disconnect” is a significant technical failure. If the concrete apron is not perfectly level—which it rarely is—a standard, uniform bottom seal will fail at the low points. Failing to account for the “settle” of the structure or the pitch of the driveway is among the most persistent common garage door weatherstripping mistakes. Effective management of this issue requires a tiered approach, utilizing oversized “bulb” seals or adjustable retainers that can compensate for topographical variances in the concrete.
Deep Contextual Background: From Felt to Thermoplastics
Common garage door weatherstripping mistakes the history of garage door sealing is a history of material science. In the early 20th century, carriage house doors were often “sealed” with simple felt strips or heavy canvas flaps. These were effective at stopping large debris but offered zero resistance to moisture or thermal transfer. As the overhead sectional door became the suburban standard in the 1950s, we saw the rise of the “nail-on” wood-and-rubber stop. This was a rigid system that offered little flexibility and was prone to rot.
The 1970s energy crisis accelerated the development of cellular PVC and synthetic elastomers. Manufacturers began to realize that the seal needed to be a “living” component. This led to the invention of the “T-style” bottom retainer, which allowed the rubber component to be replaced without removing the entire mounting track.
Today, we are in the era of co-extruded thermoplastics and dual-durometer seals. Modern seals often feature a rigid base for secure mounting and a soft, flexible fin for the actual contact point. However, as the materials have become more sophisticated, the installation requirements have become stricter. We are no longer just blocking the wind; we are managing the “delta-T” (temperature difference) between the interior and exterior environments to prevent interstitial condensation.
Conceptual Frameworks and Mental Models Common Garage Door Weatherstripping Mistakes
To avoid errors, professionals use several mental models to evaluate a seal’s effectiveness:
-
The Gasket Logic: Think of the garage door like a refrigerator door. If the gasket is compressed too much, the hinge wears out; if too little, the cold air escapes. Success is found in the “soft kiss” of the seal against the panel.
-
The Water-Shed Model: Never trust a seal to be 100% waterproof. The goal of weatherstripping is to direct water away from the opening. If a side seal is installed behind the jamb rather than on the face, it can actually “funnel” water into the wall cavity.
-
The Friction Budget: Every inch of weatherstripping adds a specific amount of drag. In a standard 16×7 door, you have 30 linear feet of contact. If each foot adds just 1 pound of drag, you’ve added 30 pounds of load to your motor.
-
The “Vermin-Entry” Pressure Point: Rodents do not need a large hole; they need a corner they can grip. A seal that “bunches” at the corners creates a grip point. A clean, mitered corner is a security feature, not just an aesthetic one.
Key Categories of Seal Geometry and Variations
Not all weatherstripping serves the same purpose. Choosing the wrong category for a specific vulnerability is a foundational mistake.
Decision Logic for Material Selection
When selecting a seal, the primary variable is the Compression Set Resistance. This is the material’s ability to return to its original shape after being crushed. Silicone has the highest resistance but is the most expensive. Vinyl is the cheapest but has a “memory,” meaning once it is crushed by a heavy door for a winter, it may stay flat in the spring, leaving a gap.
Detailed Real-World Scenarios Common Garage Door Weatherstripping Mistakes
Scenario 1: The “Frozen-to-Floor” Catastrophe
In a high-moisture, freezing climate, the bottom bulb seal accumulates condensation and freezes to the concrete.
-
The Mistake: Using a flat-bottom seal that maximizes surface contact with the ice.
-
The Failure: The homeowner activates the opener, and the motor tears the seal or the retainer off the door because the ice bond is stronger than the mounting screws.
-
The Solution: Use a “ribbed” or “beaded” seal that reduces the surface area of contact with the ground.
Scenario 2: The “Chimney Effect” in the Attic
A homeowner seals the sides and bottom perfectly but ignores the top header.
-
The Mistake: Assuming the top is “close enough” because rain doesn’t hit it.
-
The Analysis: Hot air rises. In the winter, the garage acts as a chimney, pulling cold air in through the bottom (infiltration) and pushing warm air out through the unsealed top (exfiltration).
-
The Result: The garage never stays warm despite expensive floor-sealing efforts.
Scenario 3: The “Miter-Cut” Gap
Side seals are installed with butt-joints at the corners.
-
The Mistake: Cutting the vinyl at 90-degree angles where the top and side seals meet.
-
The Result: A 1/4-inch square hole is left at each top corner. This is the primary entry point for spiders and wasps, and it allows a constant “whistle” of wind during storms.
-
The Solution: Always miter-cut the perimeter seals at 45-degree angles for a continuous thermal break.
Planning, Cost, and Resource Dynamics
Weatherstripping is one of the highest-ROI home improvements, but the indirect costs of “doing it twice” are significant.
Range-Based Economic Comparison
Opportunity Cost: Choosing the “cheapest” vinyl option often results in an opportunity cost of increased energy bills. A high-quality seal can reduce garage infiltration by up to 70%, which, in an attached garage, can reduce the heating load on the adjacent room by 5–10%.
Tools, Strategies, and Support Systems
Successful installation is less about strength and more about precision instrumentation.
-
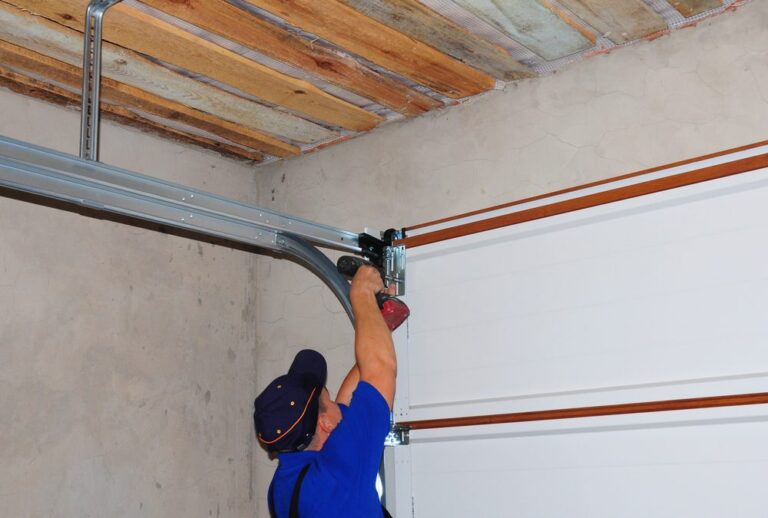
Non-Corrosive Fasteners: Using standard steel nails in a PVC seal leads to rust-streaks on the door. Always use stainless steel or galvanized “trim nails” with colored heads.
-
Heat Guns: Essential for “relaxing” a coiled seal before installation. A seal installed while it has “coil memory” will always want to pull away from the corners.
-
Silicone Lubricant (Non-Petroleum): Spraying the inside of a T-track makes sliding a new rubber bulb into place 90% easier. Petroleum-based lubricants will degrade the rubber.
-
Digital Calipers: To measure the T-width of your existing retainer. There are at least 4 “standard” T-widths, and they are not interchangeable.
-
Chalk Line: To ensure the jamb seals are perfectly straight. A “wavy” seal creates inconsistent pressure and looks unprofessional.
-
Butyl Caulk: Applied behind the retainer before screwing it to the door to create a “gasket-on-gasket” seal.
Risk Landscape and Failure Modes Common Garage Door Weatherstripping Mistakes
The “Taxonomy of Failure” for weatherstripping is often compounding. One small error leads to a systemic breakdown.
-
The Fastener-Pull Failure: If the screws are too far apart (more than 12 inches), the vinyl will “bow” between them. This creates a pocket where water can sit against the door, leading to rust on steel doors or rot on wood doors.
-
The “Paint-Bond” Failure: Installing new weatherstripping against fresh paint that hasn’t cured for at least 72 hours. The chemicals in the paint and the vinyl will bond, making it impossible to open the door without tearing the seal.
-
The Safety-Sensor Obstruction: A loose “fin” from a side seal can blow into the path of the safety sensors, causing the door to reverse randomly. This is a common “ghost” problem that leads to unnecessary service calls.
Governance, Maintenance, and Long-Term Adaptation
Weatherstripping is a “consumable” structural component. It requires a governance schedule to ensure it hasn’t lost its elasticity.
The Seasonal Adjustment Trigger:
-
Fall: Inspect for “stiffness.” If the rubber doesn’t bounce back when pressed, it won’t seal in the winter. Apply a silicone protectant to prevent ice bonding.
-
Spring: Check for “tackiness” and UV damage. Look for bird-peck damage (many birds use foam weatherstripping as nesting material).
-
Summer: Ensure the “slide” of the door hasn’t shifted the seals. High-heat expansion can cause the vinyl to “buckle” out of its track.
Layered Checklist:
-
Close door and turn off lights. Look for “light leaks” around the perimeter.
-
Run a hand along the seal to feel for “cold spots” or air movement.
-
Inspect the “bottom corners”—the most common failure point for rodent entry.
Measurement, Tracking, and Evaluation Common Garage Door Weatherstripping Mistakes
How do you quantify a “good” seal?
-
The “Dollar Bill” Test: Close the door on a dollar bill. If you can pull it out with zero resistance, the compression is too low. If the bill tears, the compression is too high.
-
Anemometer Readings: On a windy day, a digital anemometer held at the jamb should read 0.0 mph.
-
Thermal Imaging: A FLIR camera will show a “purple” (cold) line at the perimeter of the door if the seal is failing. A successful seal will show a consistent thermal gradient.
-
Acoustic Signal: A well-sealed garage will significantly reduce “road noise.” If the sound of passing cars hasn’t changed after installation, the seal is likely failing at the header.
Common Misconceptions and Oversimplifications
-
Myth: “Caulking the seal to the wall is better.” Correction: Seals must be able to move slightly. Caulking them makes them impossible to replace and traps moisture behind the vinyl.
-
Myth: “More fins mean a better seal.” Correction: Extra fins increase friction. A single, high-quality “D-bulb” is often superior to a triple-fin “comb” seal.
-
Myth: “You can use window weatherstripping on a garage.” Correction: Residential window tape is not designed for the shear forces or the “scrape” of a 200-pound moving door.
-
Myth: “Weatherstripping makes the garage ‘insulated’.” Correction: It stops infiltration (air movement), but it does not add R-value (resistance to heat flow). You still need insulated door panels.
-
Myth: “The seal goes on the door.” Correction: Side and top seals go on the jambs. Only the bottom seal goes on the door itself. Installing side seals on the door panels is a major mechanical error.
Synthesis and Strategic Resilience Common Garage Door Weatherstripping Mistakes
Mastering the elimination of common garage door weatherstripping mistakes is an act of proactive structural care. It is an acknowledgment that the “small” details—the mitered corner, the stainless steel nail, the silicone-based material—are what ultimately protect the “large” investments of the home. A garage door that is sealed with precision operates more quietly, lasts longer, and maintains a stable internal environment, regardless of the volatility of the weather outside.
The definitive approach to weatherstripping is not found in a single product, but in the rigorous application of compression logic and material awareness. By treating the perimeter of the garage door as a high-performance mechanical joint, the homeowner transitions from mere “maintenance” to true “stewardship,” ensuring that the thermal envelope remains intact and the building’s operational costs remain predictable for the long term.